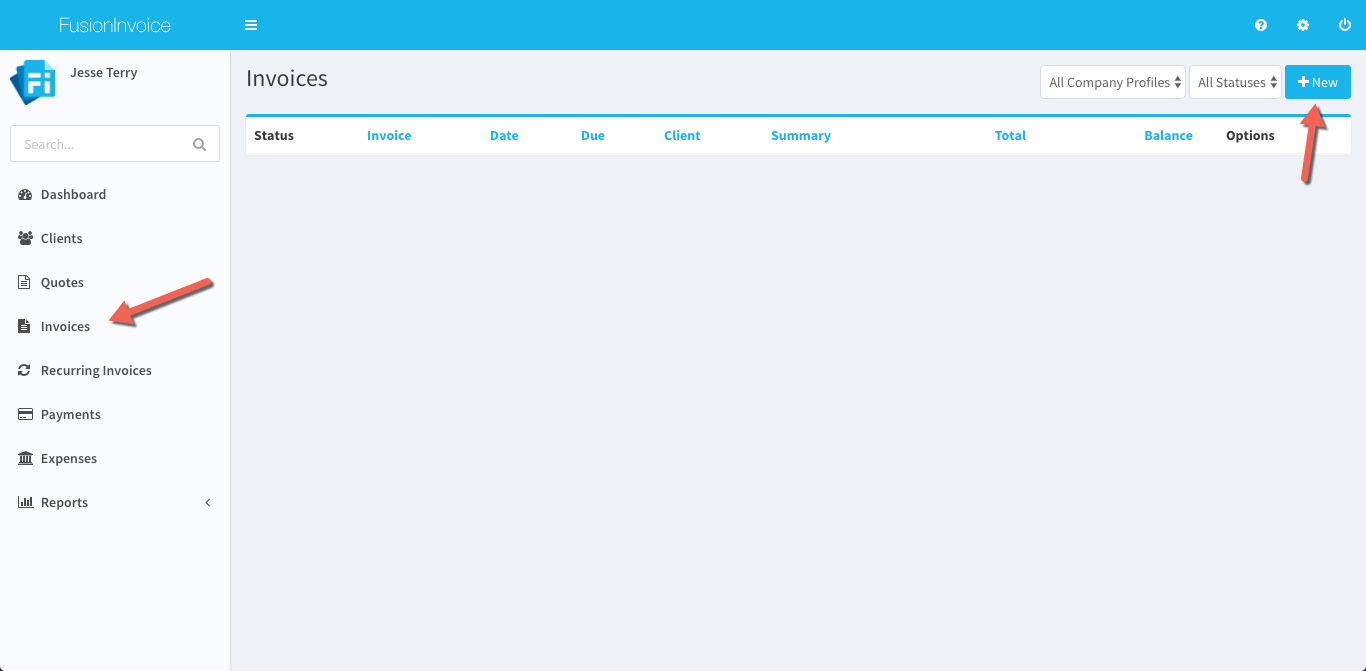
What's on the invoices list screen?
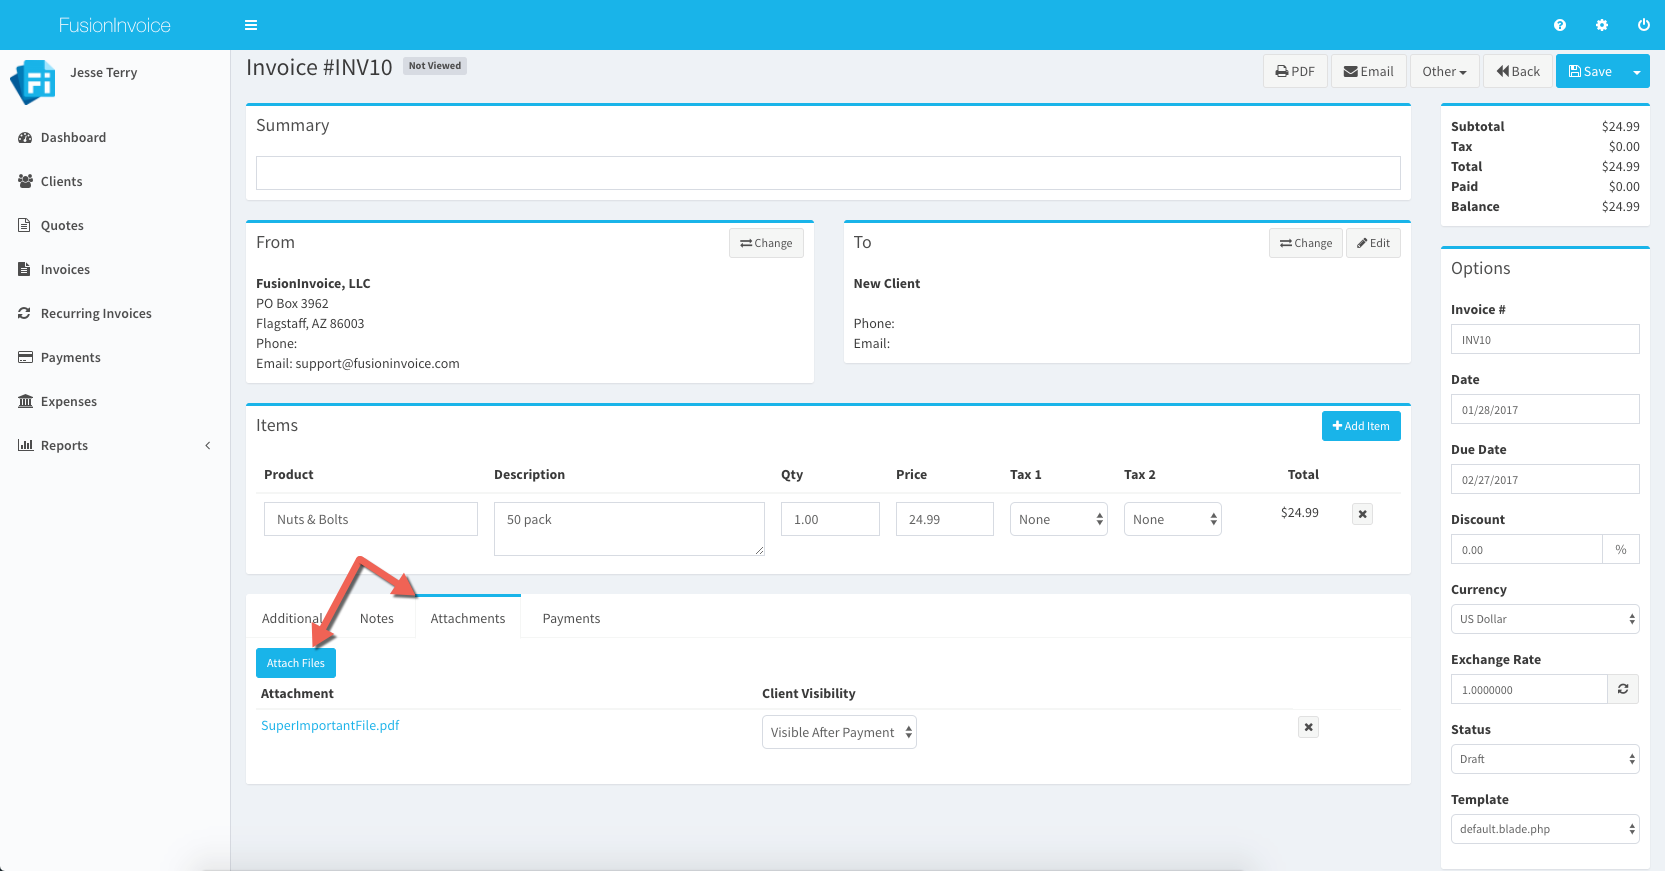
How do I attach files to an invoice?
Click the Invoices menu item and press the New button.
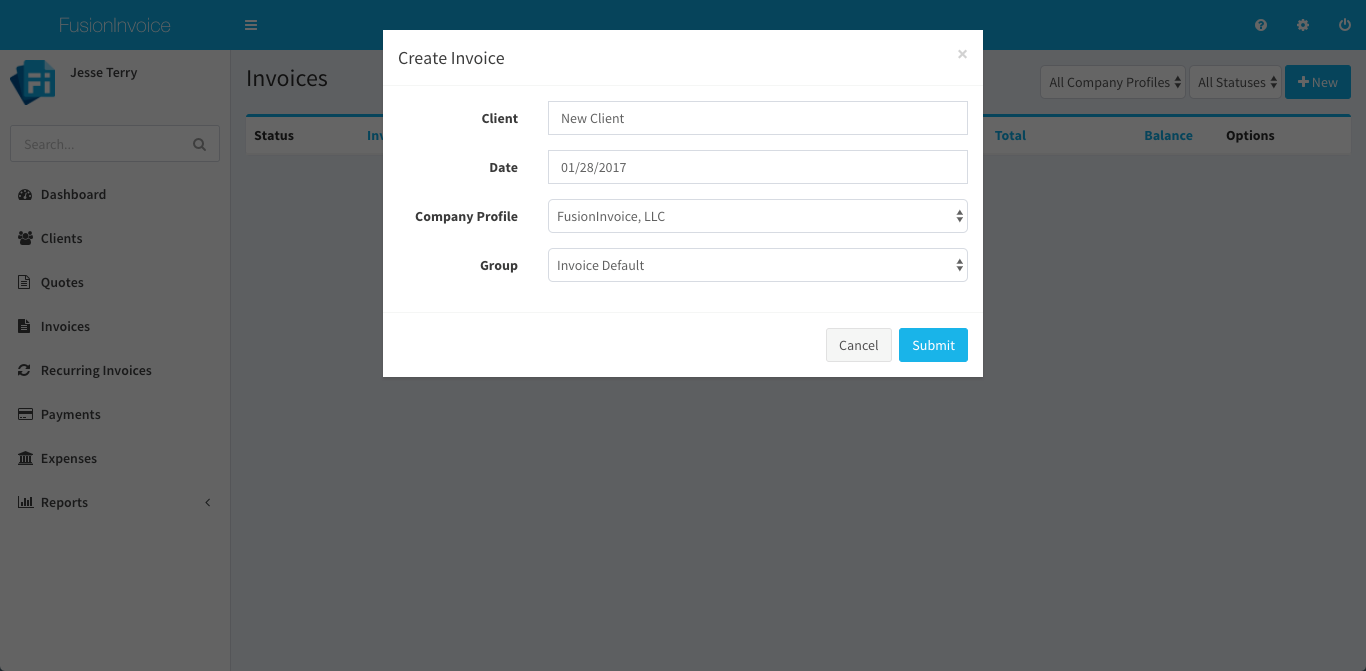
The Create Invoice screen will prompt you for the client name, invoice date, company profile and group.
If the invoice is for a new client, type the client's name in full. You will be able to edit the other details for this client record from the next screen. If the invoice is for an existing client, start typing the client's name and you will be able to select your existing client from the list that appears.
The date defaults to today's date but can be changed if necessary.
The company profile is where the invoice will pull your company name, address, phone number, and other company specific details from.
The group controls the format of the number assigned to each invoice.
Press Submit when done and you'll be taken to the Invoice Edit screen.
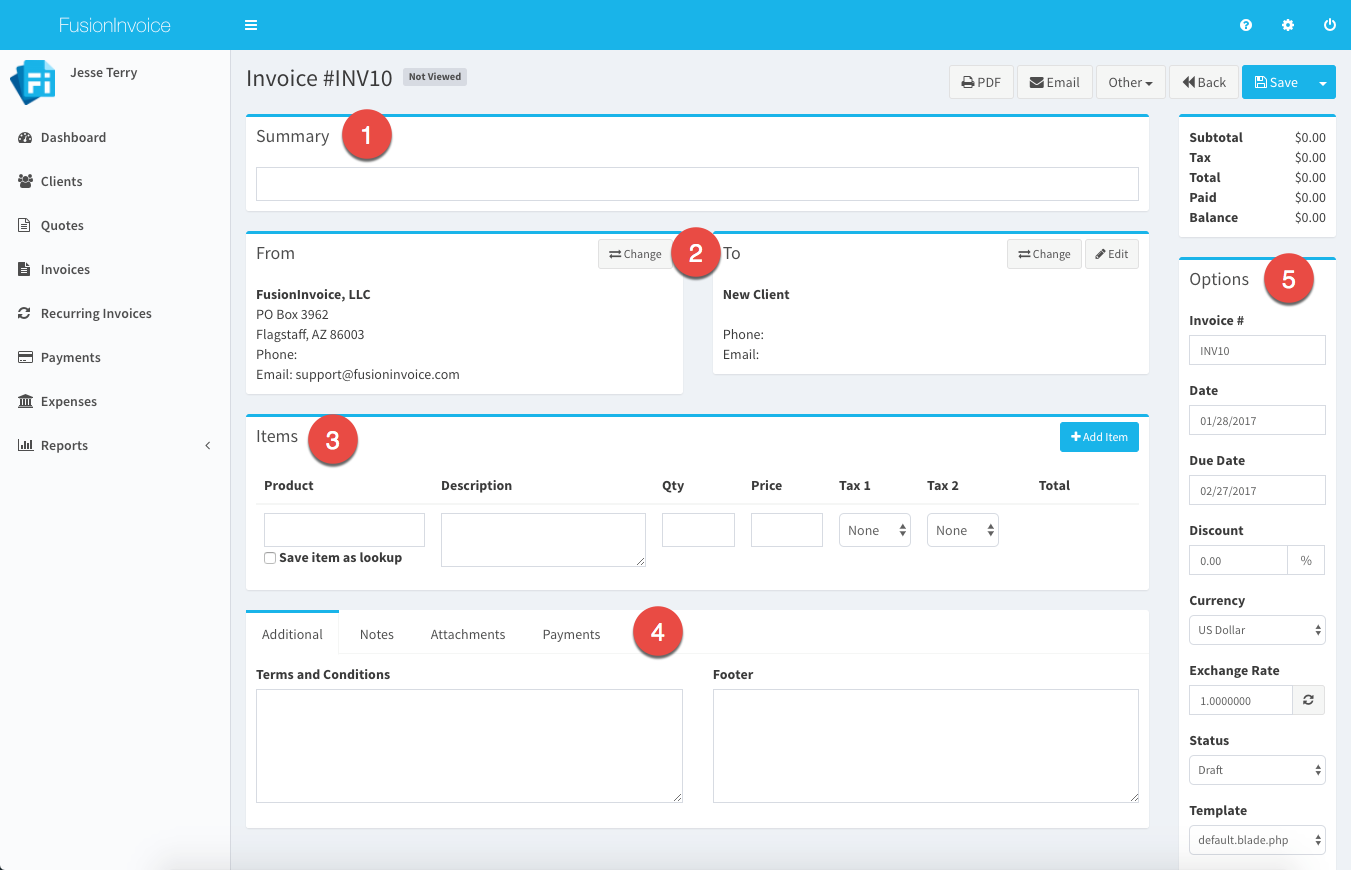
The Invoice Edit screen is where you'll add line items as well as define further properties and options for your invoice.
1. Summary
Entering a brief summary or description of the invoice will make the invoice easier to find and search for.
2. From/To
The from and to areas display who the invoice is issued from and who the invoice is being sent to. If you created the invoice with the wrong company profile selected by mistake, you can easily change that by pressing the Change button on the From area and choose the correct company profile. Similarly, if you created the invoice with the wrong client selected, you can easily correct that by pressing the Change button on the To area and choose the correct client.
3. Items
This is where you'll enter each of your line items. Press the Add Item button to add additional lines for your items.
4. Additional, Notes, Attachments and Payments Tabs
Terms and conditions as well as text to appear in the footer of your invoice may be entered on the Additional tab. Defaults for these fields may be set in System Settings on the Invoices tab (default values for these fields will not appear on invoices already created).
Public or private notes may be entered on the Notes tab. Notes entered on this tab will be visible to clients viewing the invoice using the public link unless they are marked as private. Clients may leave notes on an invoice when viewing the invoice using the public link as well.
File attachments may be uploaded to an invoice on the Attachments tab. See How do I attach files to an invoice? for details.
5. Options
A number of other options and values are defined in the options area.
the invoices list screen is the screen shown when you click on "invoices" on the navigation menu to the left. It provedes a listing off all of your invoices, with search and filter options at the top, allowing you to search for invoices and filter invoices by company profiles and status. The status filter is particularly useful, for example, when you need to know which invoices are overdue, or which are still in a draft phase.
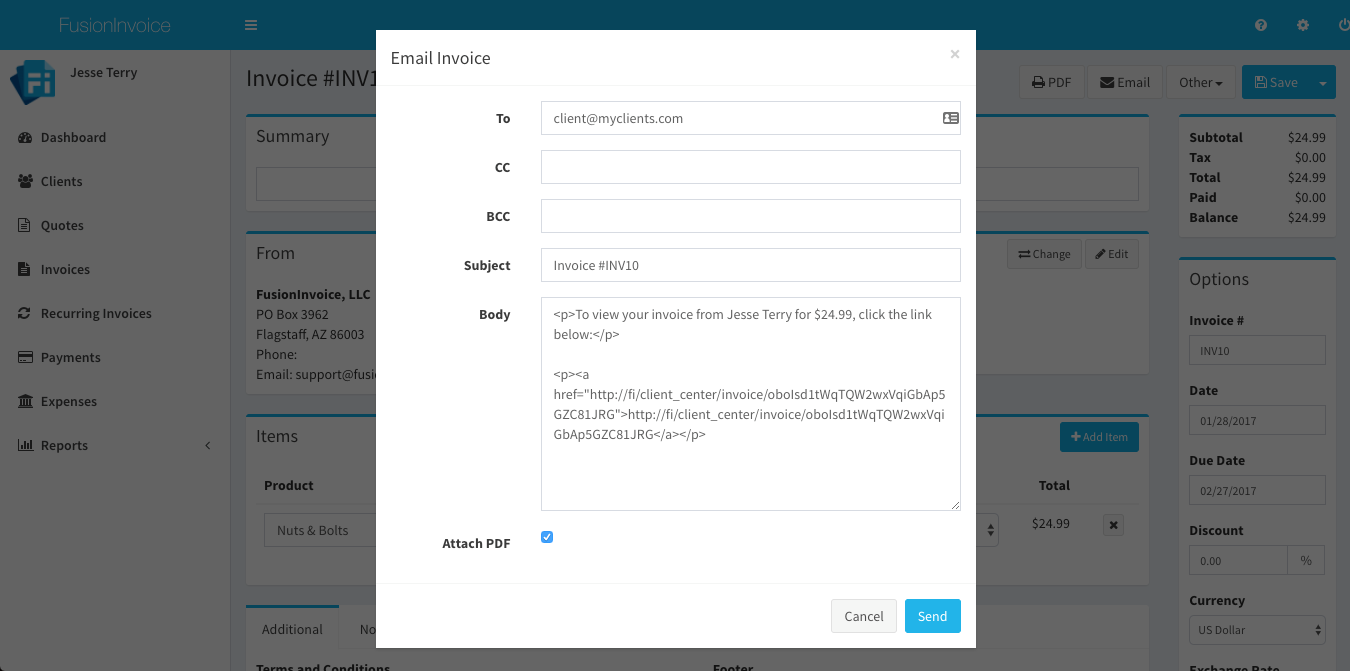
Press the Email button from the Invoice Edit screen.
* Note that the Email button will not appear unless you have configured your email settings in System Settings on the Email tab.

The Email Invoice screen allows you to add additional recipients, change the subject and / or body, if necessary.
Press the Send button to send the email.
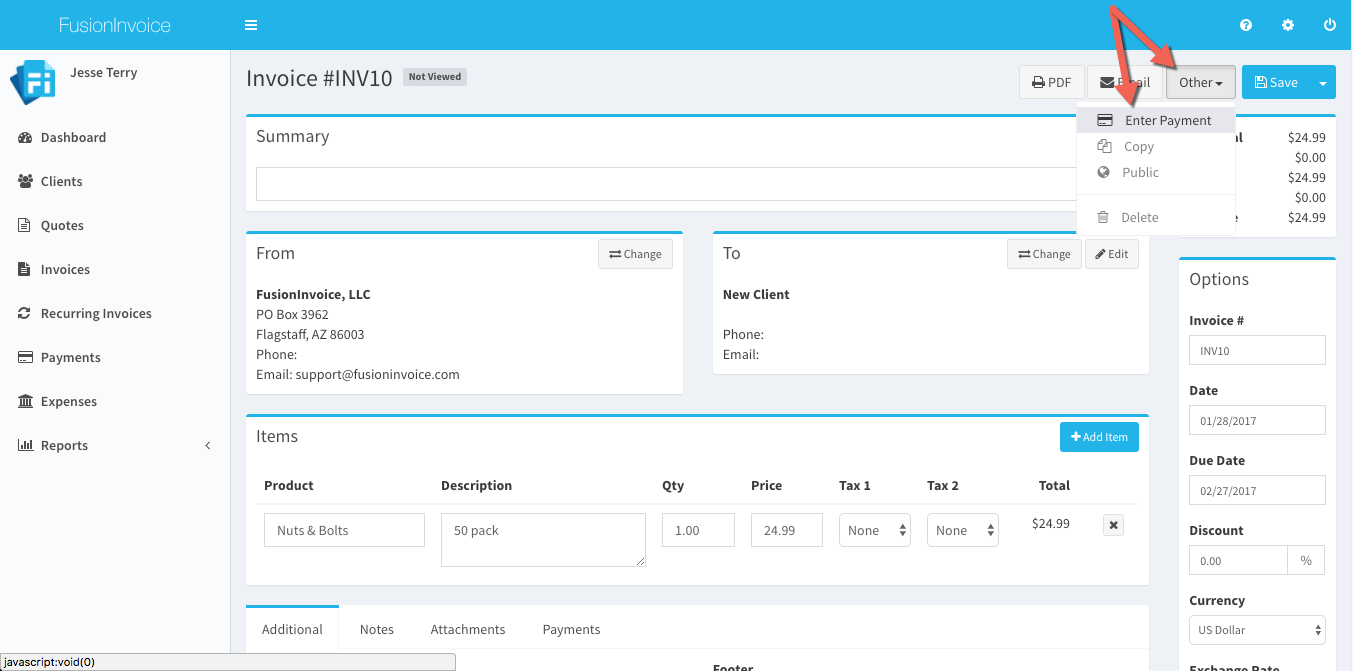
Payments collected manually can be entered against an invoice from the Invoice Edit screen by pressing the Other button and choosing Enter Payment.
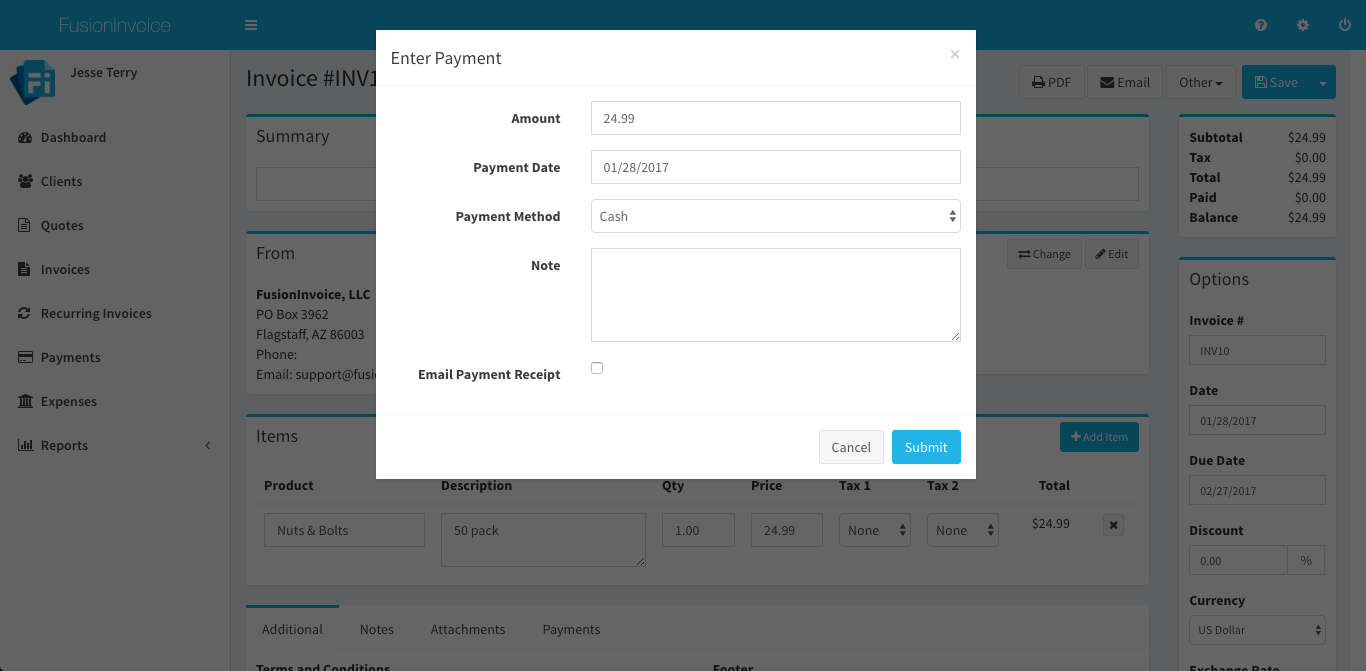
If the invoice is being paid in full, the amount field will already contain the full balance amount so you won't have to enter or change anything. If the payment being made is only a partial payment, adjust the amount as needed.
The date will default to today's date and can be adjusted if necessary.
Choose the payment method to assign to the payment. Additional payment methods can be entered in System -> Payment Methods.
A note can be optionally added to the payment.
If you'd like to email the client with an email receipt of payment, check the Email Payment Receipt box.
Press the Submit button and the payment will be submitted to the invoice.
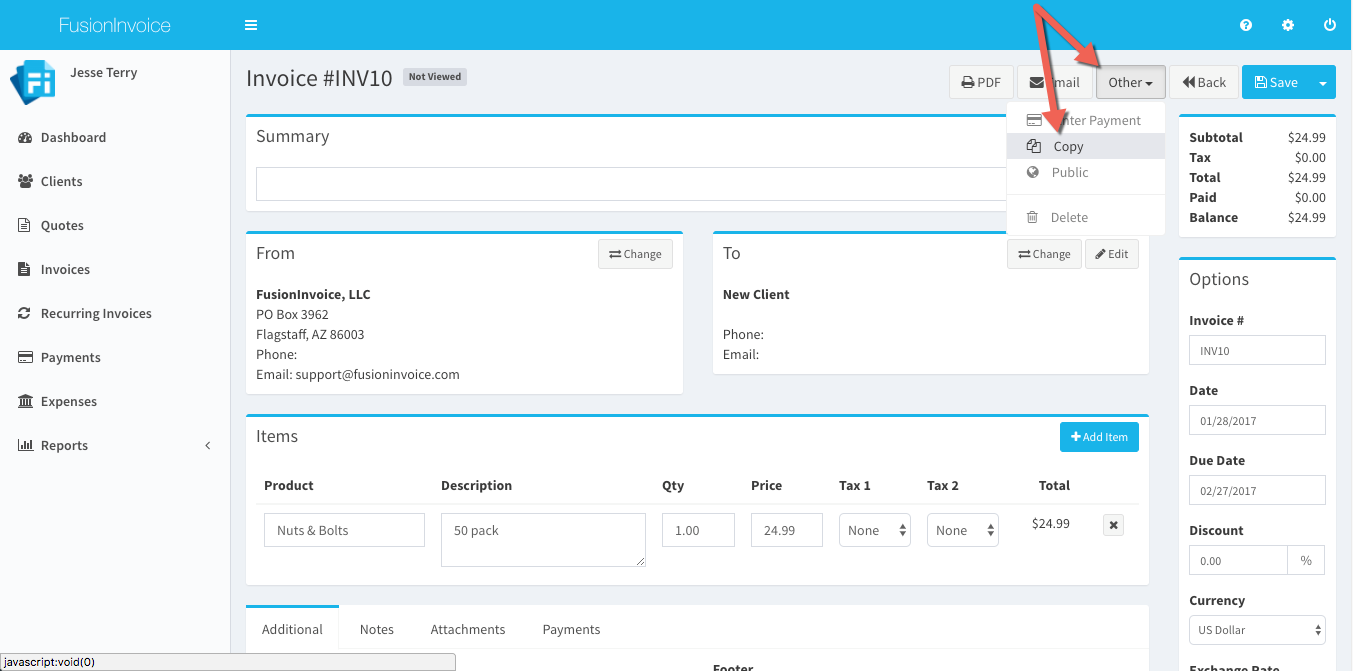
Press the Other button and choose Copy from the Invoice Edit screen.
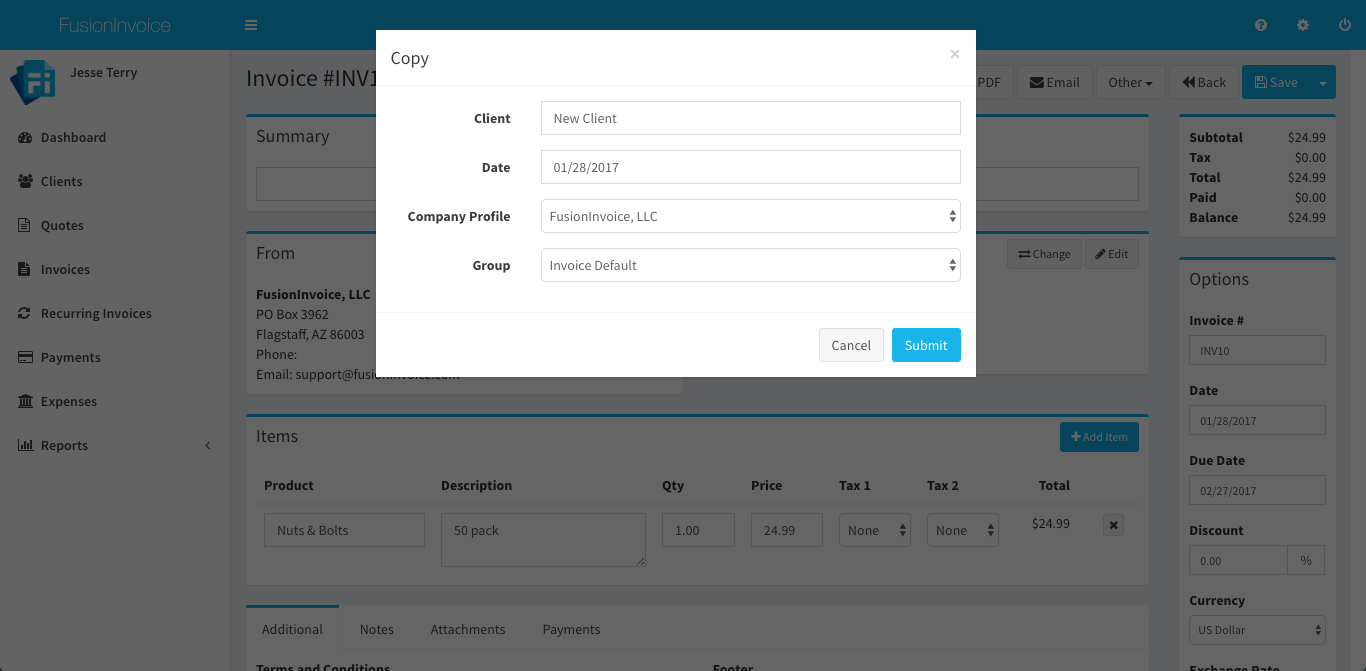
Change the client's name if the copy will be for a different client.
Review the date, company profile, and group. Change if necessary.
Press the Submit button to complete the copy.
Files of any type may be uploaded as an attachment to an invoice by clicking the Attachments tab on the Invoice Edit screen and pressing the Attach File button.
The Client Visibility option may be adjusted for each file attachment to determine whether or not the client should be able to access and download the attachment when viewing the invoice public link. The following Client Visibility options are available for invoice attachments:
* Note that attachments uploaded to an invoice do not "attach" themselves to the invoice PDF output. Invoice attachments are intended to provide an easy way to deliver digital assets related to an invoice to your clients (or just to store related files for your own purposes).
You have the option to place a QR code on your invoice to allow your customers to scan the QR code on a printed invoice and go directly to the public invoice URL to view and pay it.
This option can be turned on or off with a new setting in System>System Settings on the "Invoices" tab