What is the difference between a lead, prospect, and customer?
How do I add multiple contacts to my clients?
How do I create logins for my clients?
How do I change localization settings for a specific client?
What are notes and how do I use them?
What is the settings tab on the client record?
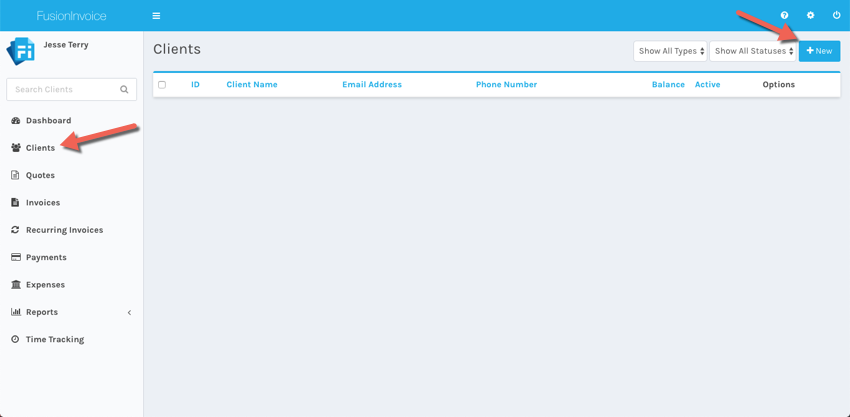
Click the Clients menu item and press the New button.
Use the Client Form screen to fill in details and contact information for your client.
Addresses can be maintained in two different ways. It is recommended to choose either option and stick with it for all clients. The first option is to use the Address field to store the entire address - including street address, city, state, postal code, country, etc. This option allows you to easily format the address as you need to with no additional fuss. The other option is to store the address, city, state, postal code and country values in their respective fields.
To allow the client to login to the Client Center, see how do I create logins for my clients.
Press the Save button when finished.
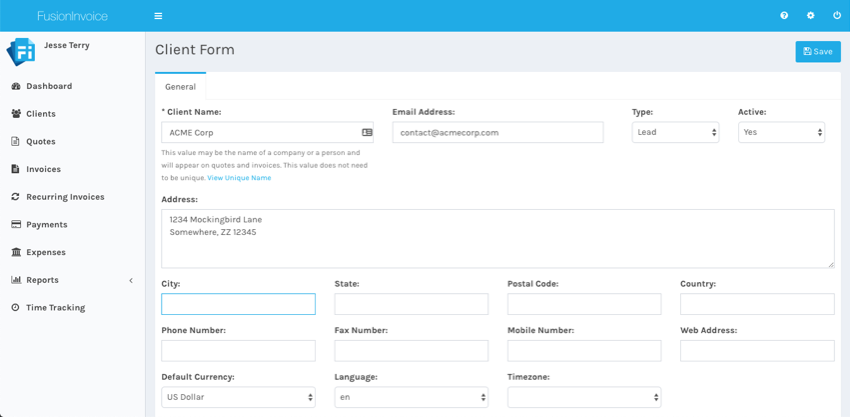
In each client record is a "client type" field, which allows you to choose whether the client is a "lead", "prospect", or "customer". These are common sales terms that allow companies to determine the value of a contact, or where they are in the sales process.
If you attempt to change an existing contact from "customer" to "lead, or "prospect" after any invoices have been sent, a visual warning will appear and it will not allow you to make the change.
The client type is also displayed as a colored indicator on the client list. A yellow indicator denotes a lead. A red indicator denotes a prospect. No indicator denotes a customer.

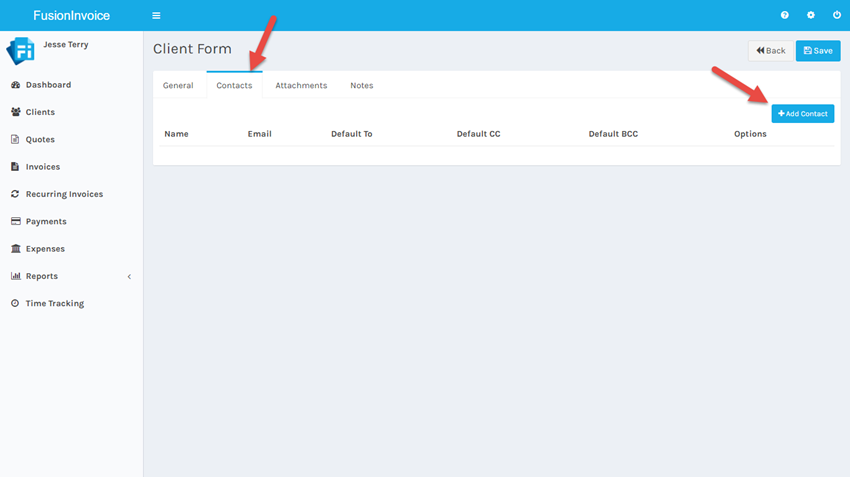
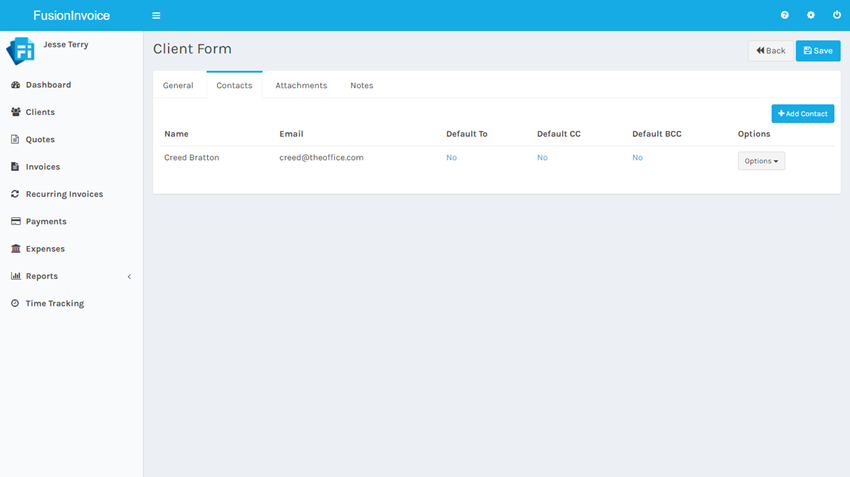
On the client edit screen, select the Contacts tab and click the Add Contact button.
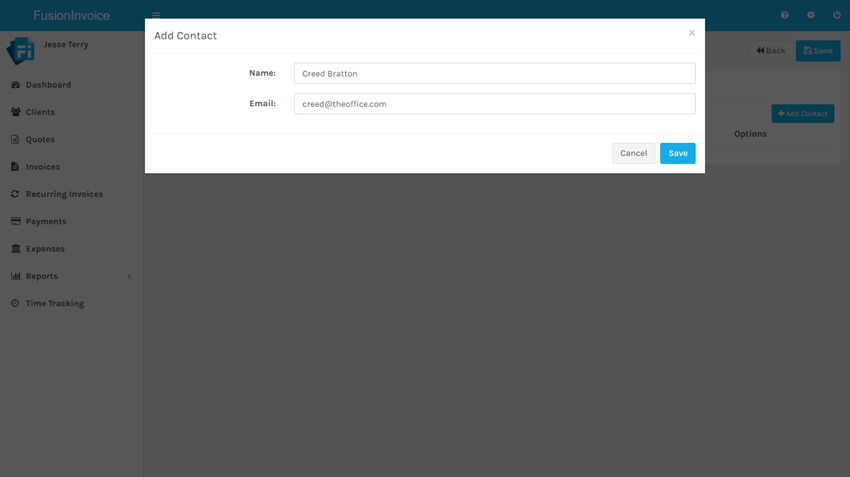
Enter the name and email address for the new contact and press the Save button.
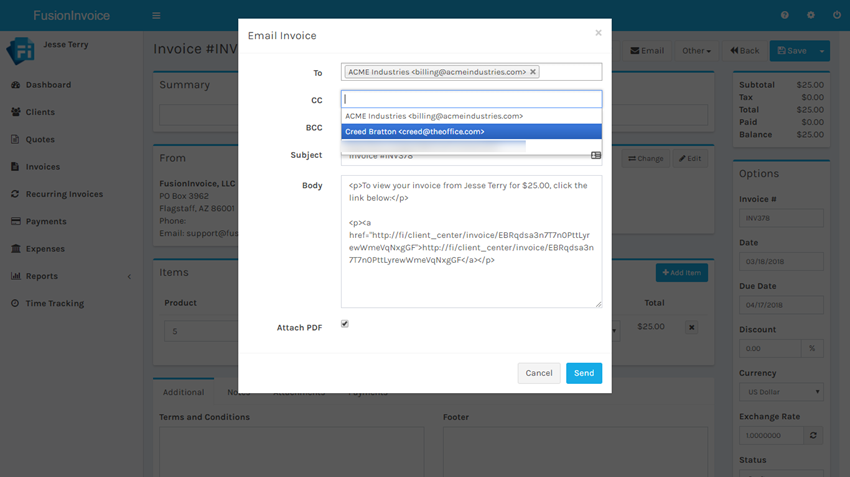
Once the contact has been added, you can set them as a default to, cc or bcc recipient for outgoing quotes and invoices for the client the contact was added to.
Contacts which are not identified as a default to, cc or bcc recipient can still be selected as a recipient when emailing a quote or an invoice.
FusionInvoice provides a limited access client login feature called Client Center. The Client Center allows clients to log in and view their own invoices, quotes and payments without being able to access anything else in your system.
* Note: Providing login access to your clients is not required to allow them to pay their invoices online. Clients pay their invoices online using the public invoice link. The Client Center is intended to provide a convenient way to provide clients with access to all of their invoices, quotes and payments in a single area.
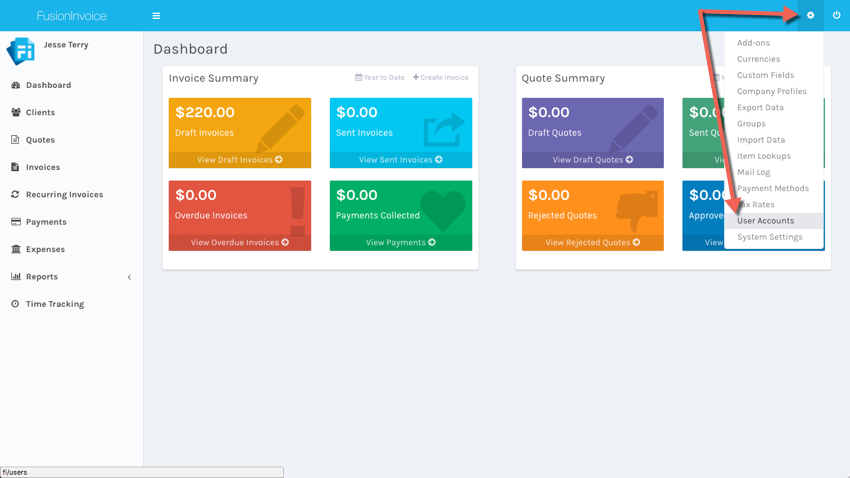
User accounts are managed under System -> User Accounts.
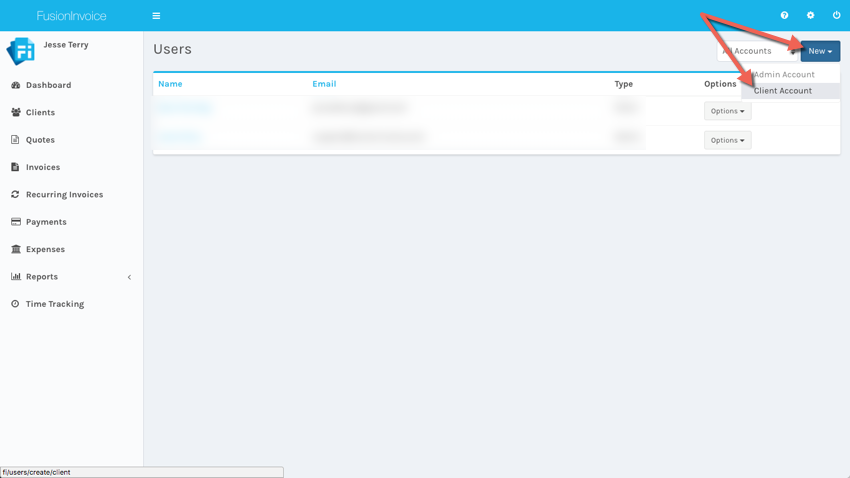
To create a client user account, click the New button and then choose Client Account.
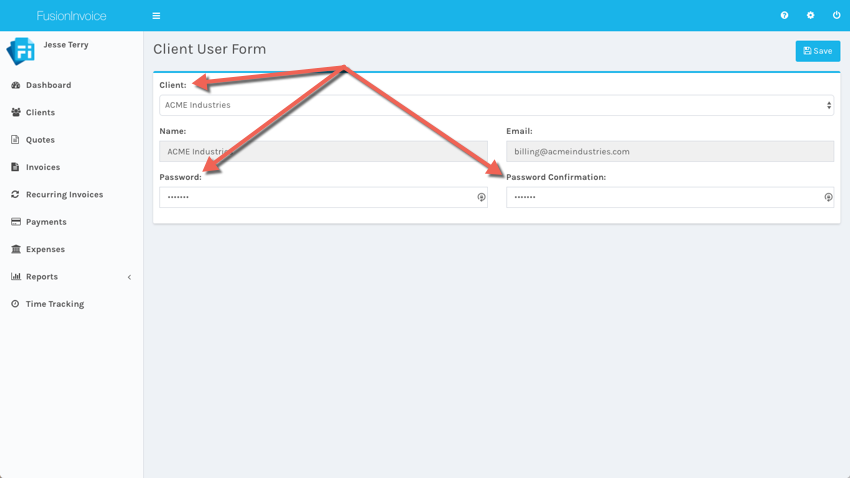
Select the name of the client to create the account for from the dropdown. The name and email address fields will fill in automatically. Enter and confirm the account password and press the Save button.
* Note: If a client isn't listed in the dropdown, it's because a) they already have a user account, b) their client record doesn't have an email address, or c) their client record is set to inactive.
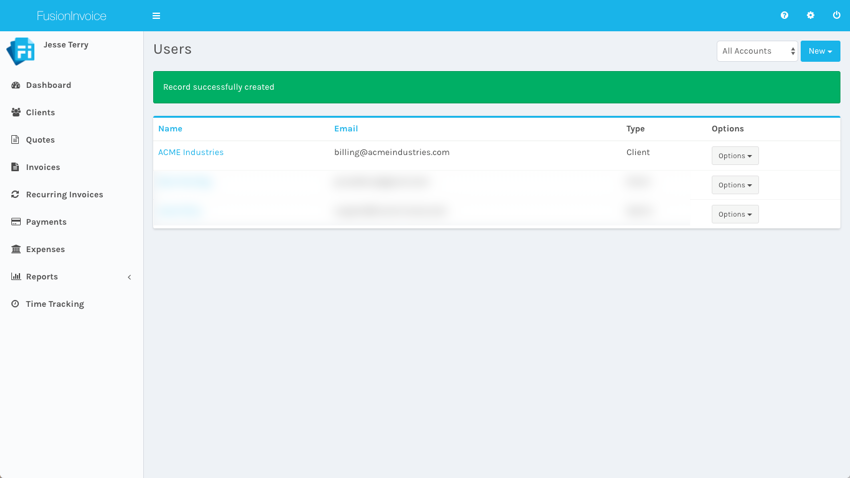
Once the account has been created, it will be listed as a Client account. Client accounts log in using the same URL as admin accounts, but they will be logged into the Client Center, which provides limited access to just their invoices, quotes and payments.
Some of your clients may use different currency or speak another language than you do. In this case, you can adjust these client records to reflect their local currency and native language.
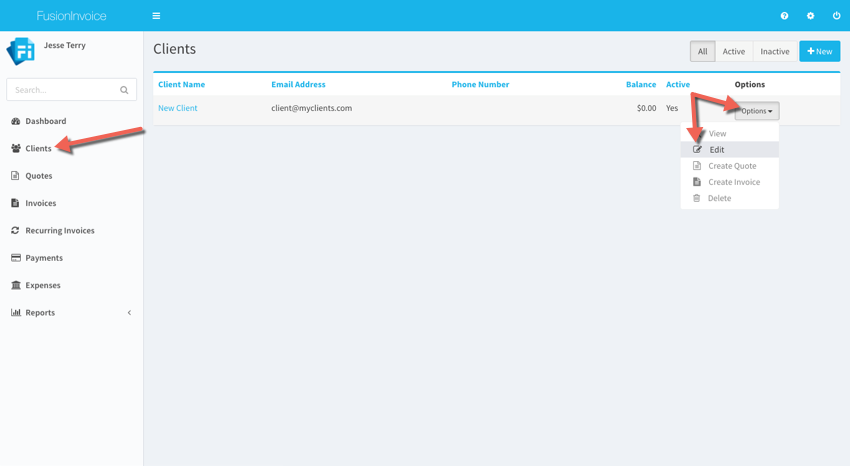
To do so, edit the client record by clicking the Clients menu item, and then pressing the Options button on the client to edit and choosing Edit.
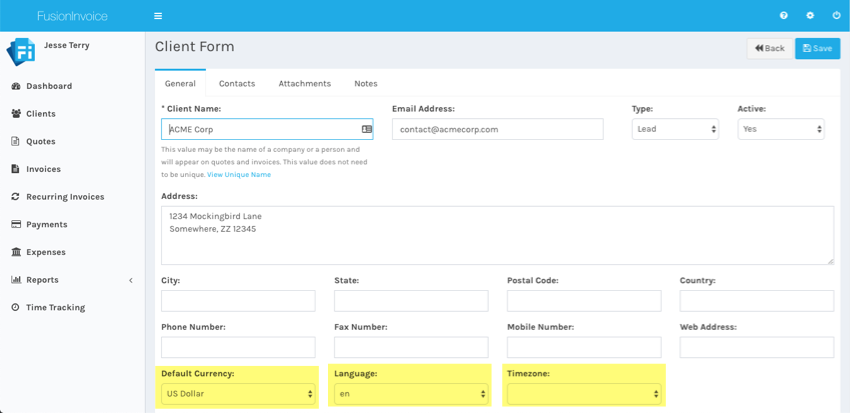
The currency, language and timezone can be adjusted on the Client Form screen when editing an existing client or adding a new client. When the timezone is set, the client's local time will display on the View Client screen.
Notes are a way of recording actions on a client account. Notes are taggable, searchable, and a badge at the top of the Note area displays the number of notes attached per entity (client, invoice, quote, task, etc).
The ability to add, edit, and remove notes is included within the user privileges system.

The name and avatar of the person who made a note are displayed at the top-left of each note. Additionally, the date and time the notes was added can be found at the top of the note.
The notes search field, found at the top right of the Notes area, allows for a more filtered search. The user has the option of searching by description, user name, and assigned tag(s).
Notes, by deafault, are shown at the bottom of the client details page. If you would prefer that they appear on a separate tab in the client record, there is an option to do so in Settings>System Settings, on the "General" tab.
This tab houses properties most often set once, or not changed often, such as: